Article: How to Make a Three-Bell Ribbon Decoration
How to Make a Three-Bell Ribbon Decoration
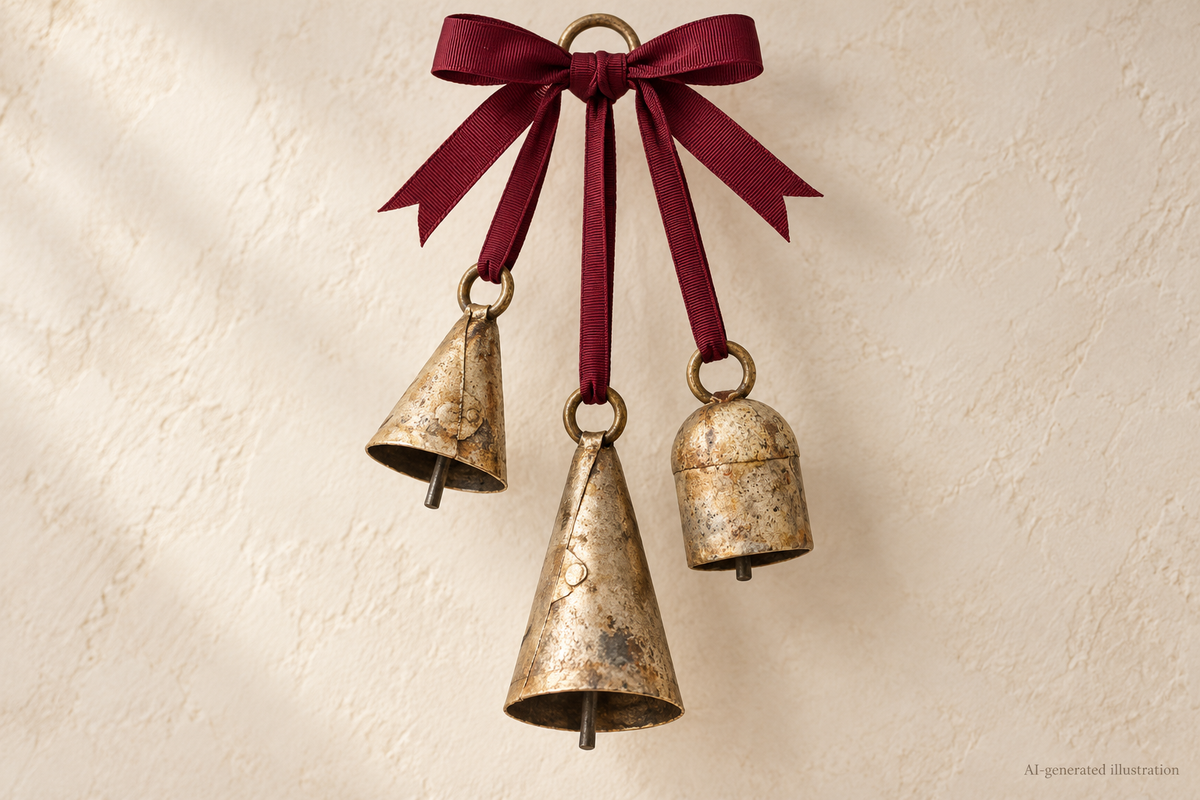
Three bells, a few lengths of ribbon and a small ring make a simple hanging decoration with a layered shape. Hang the bells at different heights, then finish the top with a bow. This version combines two cone-shaped bells with one round-top bell; three matching bells also work.
The images below are AI-generated illustrations of the project concept. Product proportions and attachment details may differ; check ribbon fit, knots and hanging support on your own sample.

Gather your materials
- Three loose bells with top attachment loops: one TL003 1.85-inch cone, one TL031 2.5-inch cone and one TL041 2-inch round-top bell.
- Narrow ribbon that passes freely through the bell loops. Start with 3–6 mm ribbon and three pieces about 45, 50 and 55 cm long; leave extra for adjustment.
- One piece of wider ribbon, about 25–38 mm wide and 60–80 cm long, for the decorative bow.
- A small, sturdy wood or metal ring, approximately 25–35 mm across, plus a secure hanging support suited to the finished weight.
- Scissors and a ruler.
The ribbon lengths are starting points. Check the actual loop openings and make a sample before cutting ribbon for several decorations.
For the mixed arrangement, select the 1.85-inch cone bells, 2.5-inch cone bells and 2-inch round-top bells. These options are sold by the dozen, so one pack of each makes twelve arrangements. Already have suitable bells? Start with those.

1. Lay out the three bells
Set the largest cone bell slightly lower in the center. Place the smaller cone and round-top bell on either side, at different heights. Leave enough space that the bell bodies and their ringers can move without catching the ribbon.

2. Attach the narrow ribbons
Pass one narrow ribbon through each bell’s top loop. Bring its two ends together so the bell hangs from the folded ribbon. Do not force thick ribbon through a tight loop or run it through the bell’s ringer.

3. Tie the bells to the ring
Pass the paired ribbon ends around the support ring and tie them securely. Start with the center bell, then adjust the two outer bells until the arrangement hangs in a gentle stagger. Keep enough ribbon above each knot for a second securing knot. Hold the ring over a clear surface and gently tug each attachment to check it.

4. Add the bow
Tie the wider ribbon into a bow around the upper part of the ring, covering the attachment area without loosening the narrow ribbons. The ring and narrow ribbon attachments carry the bells; the bow is the finishing detail. Trim the tails after you are happy with their length.

5. Hang and check the arrangement
Hang the ring from a secure hook or support suited to the completed decoration. Check the knots again, separate any touching bells and make sure the ribbon does not trap the ringers. Choose an indoor spot away from candles and other heat sources, and out of reach of young children and pets. Do not assume the bells or ribbon are weatherproof.


Make the design your own
Choose ribbon that works with the bell finish, or use three matching bells for a quieter shape. Before making a batch, complete one sample and count the individual bells needed—not just the packs in your cart.
For help choosing sizes and quantities, see our guide to bells for holiday crafts. For other project ideas, read practical uses for bells.